An Apple Crumble With Three Different Kinds of Crunch
Build a rough oat topping with flakes, crumbs and clusters, then choose apples that soften without flooding the dish.
8 min read
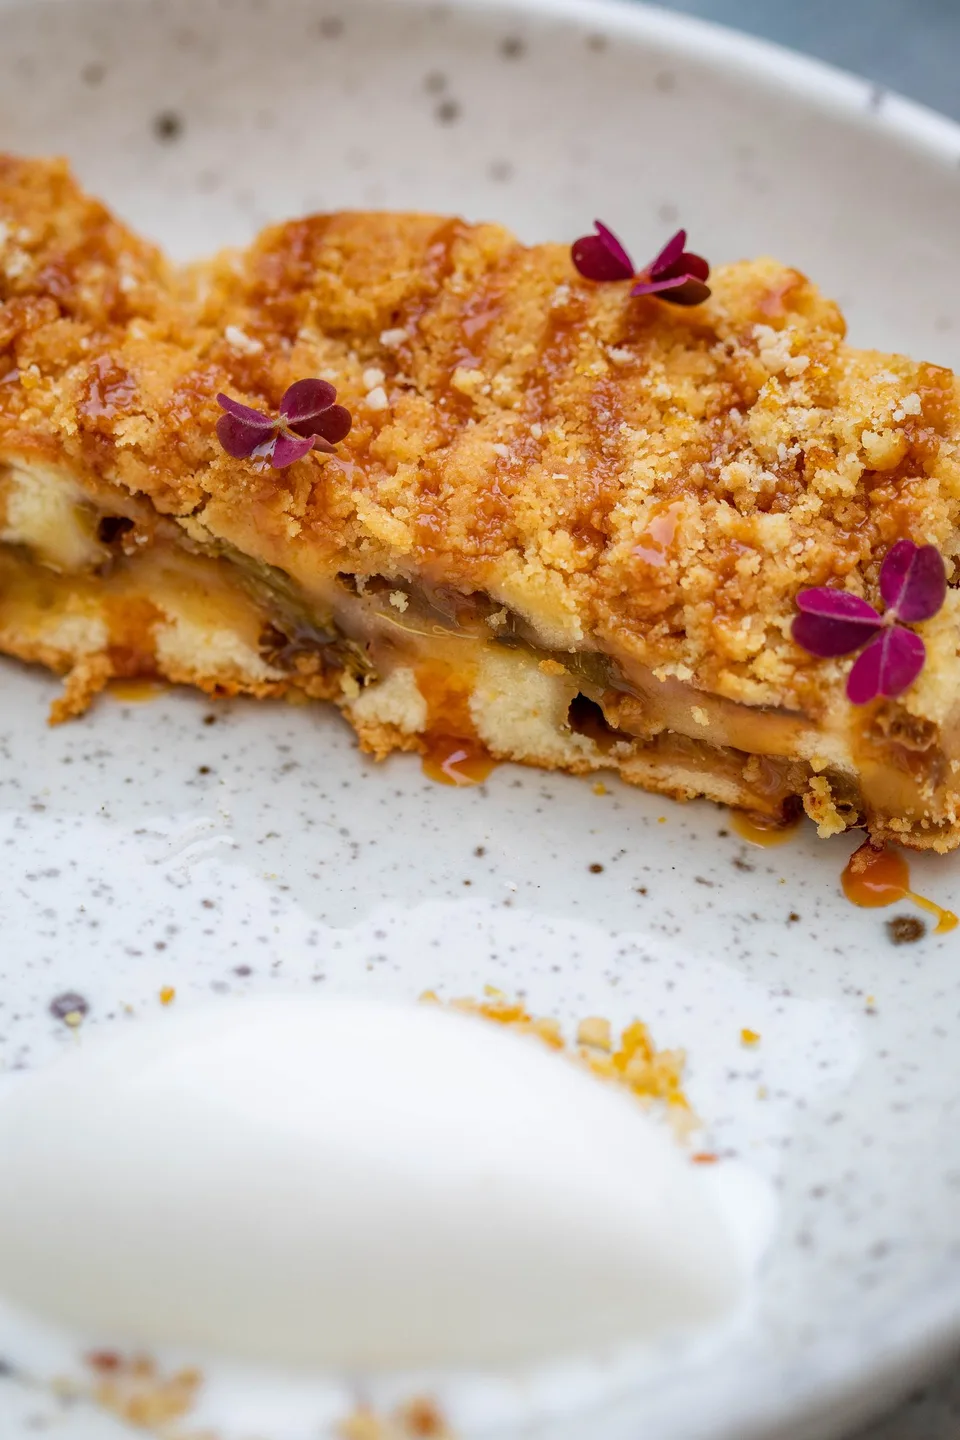
A good crumble presents a choice as soon as the spoon goes in. At the edge there is a thin, sugary rim that breaks cleanly. A little farther toward the center, oats have toasted separately and still have the shape they had in the bowl. Then a clump comes away in one piece with a dark underside where it touched the fruit. Getting those textures from the same handful of flour, oats and butter requires leaving the mixture uneven. It also requires enough room for steam to escape. A tall dish packed with fruit can soften a perfectly good topping while the apples in the middle are still firm.
For a crumble that serves six, use a shallow baking dish about 9 inches across, or a metal pan with a similar area and sides high enough to hold the filling. The fruit layer will be around an inch deep. A deeper dish holds more fruit, but the extra quantity is better baked in a second dish if the topping is the part you are looking forward to. The relationship between surface and depth is more useful than an exact pan shape. A long dish gives plenty of edges and makes for generous portions of crust.
Choose apples with a job in mind
Buy enough apples to give you about 750 grams after peeling and coring. A mix of firm tart apples and fragrant apples that soften a little more readily makes the filling interesting. Use roughly two-thirds firm apples such as Granny Smith or Pink Lady. The remaining third might be a Golden Delicious or a ripe apple whose taste you like out of hand. An apple that readily cooks into sauce has a purpose here. It can fill the gaps between sturdier pieces, giving you a spoonful that holds together without needing a thick paste of starch.
Taste a wedge. A tart apple that seems almost severe raw may work beautifully after a spoonful of sugar and a warm topping. A very sweet apple can taste dull after it has baked. Add lemon to the latter instead of adding spice automatically. Cinnamon is useful in a small quantity, but the point of this crumble is that the fruit will have a recognizable taste after twenty or thirty minutes under a blanket of oats. Leave the cinnamon out if the apples have an interesting aroma of their own.
Peel and core the apples and cut them into pieces about half an inch thick. A few irregular points will soften faster. Avoid having many slices thinner than a quarter inch, which can disappear while the thickest pieces are still cooking. If you leave the skins on, use apples with particularly tender skins and expect some extra chew. Peeling works well for a first attempt because it makes the contrast between filling and topping easier to read. You can use the peel for a separate purpose or discard it.
Keep the fruit layer loose
Toss the prepared apples with 25 to 40 grams sugar, a tablespoon lemon juice and 8 grams cornstarch. Add a small pinch of salt. Use the lower end of the sugar range for very sweet fruit. If the apple slices are firm and do not release much juice, there is no need to add extra starch. The apples will make liquid in the oven and the starch will help just enough to coat them. If you add a great deal, the first spoonful may taste like a glaze applied to apple pieces rather than the fruit itself.
Transfer the mixture to the dish as soon as it is mixed. It can wait a few minutes while you finish the topping. If you toss the fruit half an hour ahead, the sugar may draw a puddle out of it. Tip the dish to see how much liquid is there. For a very large puddle, stir the fruit again and consider leaving a spoonful behind rather than pouring it all into the pan. Different apples vary enough that this decision is best made with the dish in front of you.
Spread the pieces into an even layer and avoid packing them down. A loose arrangement gives liquid space to bubble through and lets the points of some slices touch the crust. These are the places where clusters underneath can take on a little flavor without every oat going soft. If your baking dish tends to catch spills, put it on a rimmed baking sheet before it goes into the oven. Handling one steady sheet is easier than trying to find another surface after syrup has started to bubble over.
Make a topping with an irregular grain
Set out 90 grams old-fashioned rolled oats, 90 grams all-purpose flour, 75 grams light brown sugar, half a teaspoon fine salt and 100 grams cold unsalted butter, cut into small pieces. Stir the dry ingredients together first and break up large lumps of sugar. Add the butter and pinch it into the flour and oats. Turn the mixture with your hands several times to bring the dry material at the bottom into reach. Stop when most of the butter is in rough flakes and the bowl still holds some loose crumbs.
Squeeze a handful briefly. It should make a cluster that breaks into two or three pieces when you press it. Make several of these clusters and leave the rest loose. The biggest lumps should be small enough to bake through without leaving a greasy core. A few pieces the size of a grape are useful. If the entire mixture feels as though it could be rolled into a smooth dough, spread it out and break some back into fine crumbs. The variation creates the different textures in the finished crust.
Keep the topping cool while the oven heats. Set the oven to 375°F or about 190°C. Distribute the topping over the fruit with a slightly heavier hand at the edges, where small crumbs can toast thoroughly. Leave a few places where the fruit shows through. They give you a view of the filling as it bakes, and the finished dish will have several points where a spoon can go in cleanly. Take care around the middle. A mound in the center looks generous before baking, but it can insulate the thickest section underneath.
For a smaller household, use two small dishes at the outset. Bake both if you want a portion for tomorrow, or bake only one and keep the remaining apples and topping separately chilled for a later bake. A small dish loses heat quickly after it comes out, so check the middle with a skewer instead of deciding by crust color alone.
Look for bubbling away from the rim
Begin checking around 35 minutes and expect the dish to need somewhere around 40 to 50 minutes, depending on its depth and the apples. You should see golden oats and at least one active bubble near the center, with slightly darker coloring around the edge. A thin skewer should pass through several apple pieces in the middle without much resistance. If the topping is browning too fast, put a loose piece of foil over it for a few minutes while the fruit finishes. Remove the foil as soon as the dish leaves the oven so steam does not collect beneath it.
The small cluster you can see at the corner may already feel firm, while the oats near the middle will still be relatively soft. Give the crumble about twenty minutes on a rack before scooping. The liquid will settle a little and the crust will become easier to break. The difference between a crumble eaten straight from the oven and one given that short wait is especially obvious if you plan to serve cream alongside it. The cream will stay cold long enough for the first bites to have both temperatures.
Use a broad spoon to break through the crust and lift fruit and oats together. A narrow serving spoon tends to dig a hole beneath a section of unbroken topping. Scoop from an edge first if you like the crisp rim, or start at the center to give the edges to people who want them. Either way, keep the ice cream or yogurt beside the crumble instead of over the entire dish. The separate topping lets people decide how much of their crust should soften as they eat.
Keep the topping for another dessert
If part of a baked crumble is left, refrigerate it covered once it cools enough to handle. The topping will soften overnight. Rewarm only the portions you need in a shallow ovenproof dish until the crust feels a little dry again. A microwave makes the fruit pleasantly warm but tends to leave the oats limp. For a cold breakfast portion, add a small spoonful of freshly toasted oats just before serving. That gives a similar contrast without having to reheat the whole pan.
An unbaked portion of topping can also go into the freezer, spread into a small container so it does not become one solid lump. Sprinkle it onto fruit while still cold and bake until the filling visibly bubbles and the topping cooks through. Soft fruit may need a different baking time. If you try pears, use firm ones and cut the pieces on the thick side. If you try berries, use a broad dish and taste the filling after it cools before deciding whether it needed more starch. Preserve the irregular surface of the topping. That is the detail worth repeating, whichever fruit you put underneath it.