A Pear Galette for the Day You Cannot Find the Pie Dish
Use a baking sheet, a handful of firm pears and a thin layer of almond meal. A free-form crust gives the fruit room to show.
7 min read
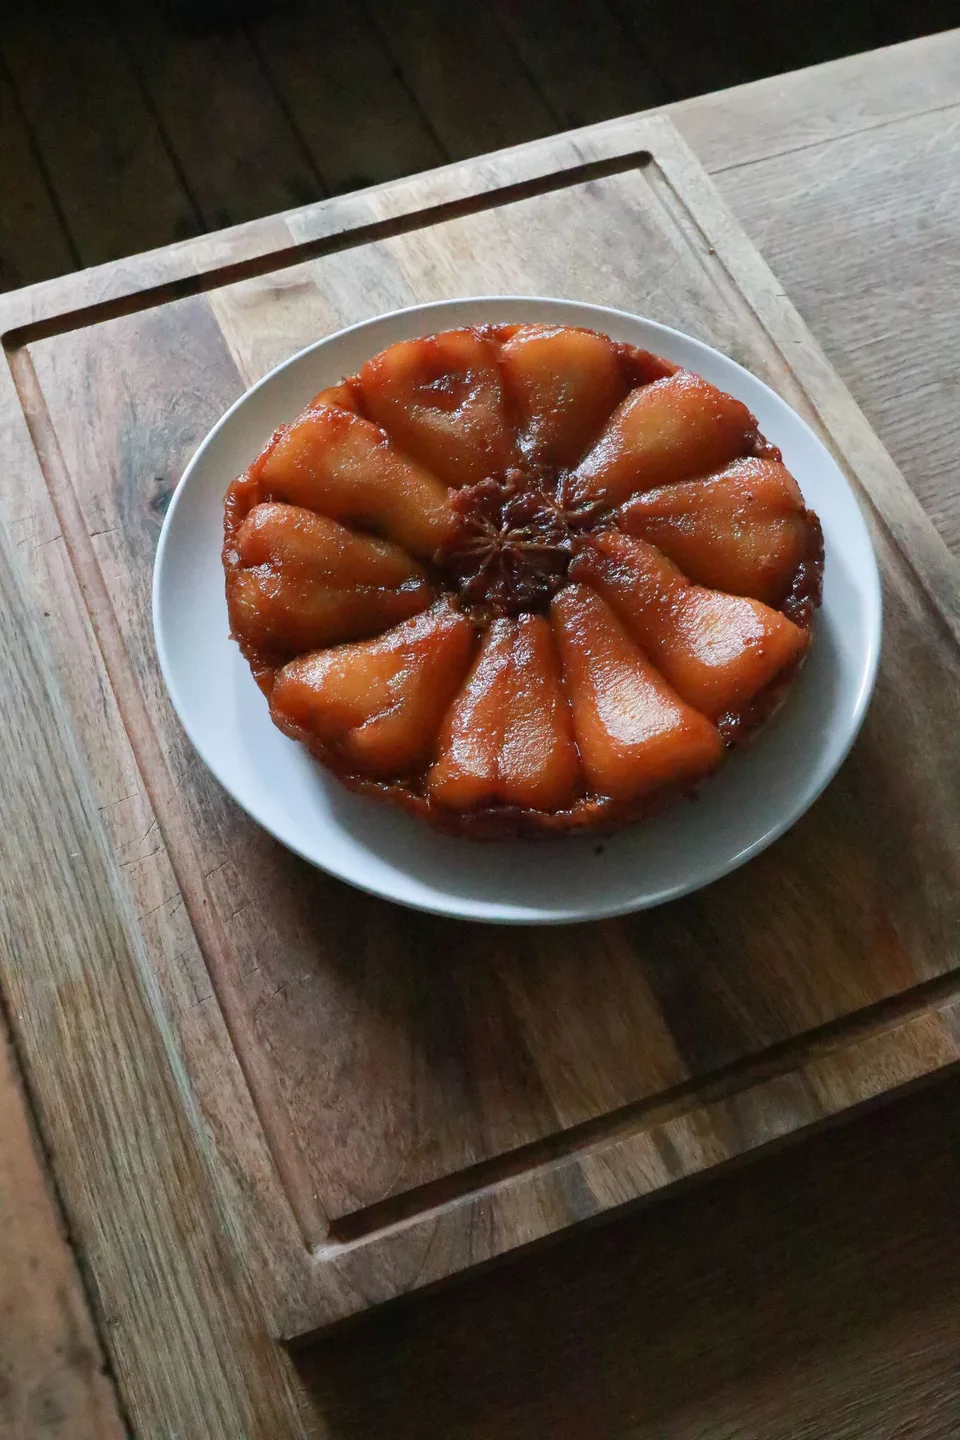
A pie dish gives pastry a shape before the filling touches it. A galette earns its shape one fold at a time. You can make the circle slightly crooked and overlap the folds at different angles. What matters is that the fold at the bottom meets the dough beside it and that the fruit stays far enough from the edge for you to lift it. A small amount of juice will find its way onto the paper anyway. That does less harm than it seems, provided the base is baked well enough to support a slice.
Pears are a useful filling because they bring their own sweetness and make an attractive arrangement without needing a deep layer. They also teach a clear lesson about ripeness. A pear that is soft enough to bruise while you peel it may yield so much juice that its slices become difficult to see in the baked tart. One that is still hard enough to snap can stay dry at the ends even after the crust browns. The useful middle ground is a fruit whose neck yields slightly to gentle pressure and whose body is firm enough to slice.
Roll a dough you can lift
For one galette, weigh 180 grams all-purpose flour, 115 grams cold unsalted butter, half a teaspoon fine salt and a tablespoon of sugar. Measure about 55 grams ice water, with a little more on hand. Stir the flour, salt and sugar together. Cut the butter into small cubes and toss them in the flour. Flatten them quickly with your fingertips until most are flakes and the flour looks rough. Some butter will work its way into the dry ingredients. Leave plenty of visible pieces.
Drizzle about three quarters of the water over the bowl. Toss with a fork and squeeze a small handful. Add the remaining water in short pours until the squeeze holds, with a few cracks along the outside. A mixture that gathers as soon as you touch it may be wet enough to stick during rolling. One that remains dusty after you press it will be difficult to fold over the pears. Add extra water a teaspoon at a time if needed. The amount varies with the flour and how finely the butter was cut.
Tip everything onto a clean surface and use a scraper to gather it into a mound. Press the loose edges inward, flatten the dough into a thick disc and wrap it. Chill for at least an hour. It can stay wrapped in the refrigerator overnight. Flattening before chilling saves work later. A ball chills into a hard lump that must be pushed down before it will roll. A disc gives you a useful shape while the butter is still pliable, then rests evenly in the cold.
Make a thin bed for the fruit
You need about 450 grams of usable pear after coring, which is often three medium pears. Peel them if the skins are tough or if you want the surface to look uniform. Halve and core them and cut slices a quarter inch thick. Slices with a little thickness are easier to overlap and still have shape after baking. Cut away deep bruises and any woody bits near the stem. If you have a very small pear and two large ones, use the short slices around the perimeter instead of trying to make every section the same.
Toss the slices gently with a tablespoon of lemon juice and 25 grams sugar. Add a little finely grated lemon zest if the fruit tastes mild. You can also use a few pinches of ground ginger, but choose just one accent for the first bake. Look at the bowl after five minutes. If it holds a pool of juice, lift the slices out when you arrange them and leave most of the liquid behind. A galette needs less liquid than a dish that supports a deeper filling.
Set aside 25 grams almond meal and a teaspoon of flour to scatter beneath the fruit. The meal absorbs some moisture and leaves a fine layer with a faint toasted flavor. If you are avoiding tree nuts, use a little plain fine dry bread crumb or crushed unsweetened plain biscuit suited to your needs. Check ingredients and contact surfaces if cooking for someone with an allergy. The thin bed should sit only under the pears. If it goes out to the edge, it makes it harder for the folds to stick together.
Form the galette on the paper
Heat the oven to 400°F or about 200°C. Set a rack just below the middle. Tear a sheet of baking parchment large enough for the baking sheet. Roll the chilled dough on a lightly floured surface until it is about 12 inches across and roughly an eighth of an inch thick. Start from the middle and roll outward with short passes. Rotate the dough often so it does not stick. If it cracks at the edges, let it sit a few minutes, press the worst gaps together and continue. If it turns soft and greasy, chill the sheet briefly before arranging the pears.
Wind the dough loosely around the rolling pin and unroll it onto the parchment. You can roll directly on the paper if the paper lies still on your work surface. Brush away loose flour. Mark a circle about 8 inches across with a fingertip and scatter the almond mixture inside it. Place the pears in loose overlapping rows or in a spiral. Begin from the outside and work inward so you can see where the end pieces will fit. One layer with generous overlap works better than a high pile, which pulls at the dough and makes the center slow to bake.
Leave roughly two inches of dough all around. Fold a short section over the fruit and then fold the next section so the new crease overlaps the first. Work around the circle, easing the paper away from the dough if it adheres. The folds should overlap without a large gap on the side. Press the overlap gently at the base, where leaks can start. There is no need to squeeze the outer rim into a thick rope. You want a fold that can bake through in the time the fruit takes to soften.
Judge the base as well as the pears
Slide the parchment and pastry onto a rimmed baking sheet. Brush the exposed pastry with a thin layer of beaten egg or milk if you want a deeper color. A little coarse sugar on the dough adds texture. Avoid putting a thick coat into the creases where it can collect. Refrigerate the assembled tart for ten or fifteen minutes if the dough feels soft. The shape holds more easily when the butter starts out cool.
Bake for about 35 to 45 minutes, watching the underside near the end. The rim should be deeply golden at the folds, and the pear slices should look tender with a little bubbling between them. Slide a thin metal spatula under one edge and lift just enough to inspect the crust. A pale, flexible base can use a few more minutes even if the tops of the pears are already soft. If the rim darkens too quickly, place foil loosely over its most exposed section. If the base seems done before the middle, move the pan a rack higher and let the fruit finish.
A small pool of amber syrup on the paper is no reason to dismantle the galette. Let the pastry settle on the sheet for five minutes, then slide the paper onto a rack if you can do so safely. If a patch of syrup has glued the base to the paper, wait until the crust firms and slide a spatula underneath with a short careful motion. Lifting from the far edge can tear the bottom if it is caught in the middle.
Cut through a fold with a sharp knife
Let the galette rest for twenty minutes if you are serving it warm. A serrated or sharp chef's knife can cut the fold cleanly. Make small movements until the crust gives, then press through the fruit. Use a broad server to take the whole wedge, including the tip. A pile of fruit close to the middle is apt to slide away from a very narrow piece. Cut six broad wedges for a firm tart and fewer if the slices are particularly soft.
Spoon yogurt, crème fraîche or ice cream beside the pastry if you want a cool contrast. There is no need to cover the pears. Their arrangement is useful because you can see which slice you are going to get. An outer piece may have more crust and fruit with slightly drier edges. A central piece will have more soft fruit. In a free-form tart the portions are visibly a little different, and people can choose what they prefer.
Next time, change the fruit thickness if the result needs adjustment. Slices that seemed too firm can be cut thinner or chosen at a riper stage. Fruit that disappeared into the crust can be cut thicker and drained after tossing with sugar. If the pastry holds together and the fruit tastes like pear, there is little reason to worry about a crooked edge. The missing pie dish gave you more exposed crust and one fewer piece of equipment to wash.